
Choose the target board, connect a WebSerial port, refresh ports and check the live connection status.
Connect Device & Select Board
Connecting hardware is the first step to compiling and uploading from Gokino.
1. Board Selector
Tell Gokino which board you are using so the compiler targets the right architecture.
- Location: left side of the Header, showing the current board name (e.g., "Arduino Uno R3").
- How to use:
- Click the board name to open the selection list.
- Search: type a name or series into the search box (e.g.,
nano,esp32,mega). - Select: click your board in the filtered results.
- The selected board is stored locally and restored after a page reload. Install more cores in the Boards tab of the Sidebar to extend this list.
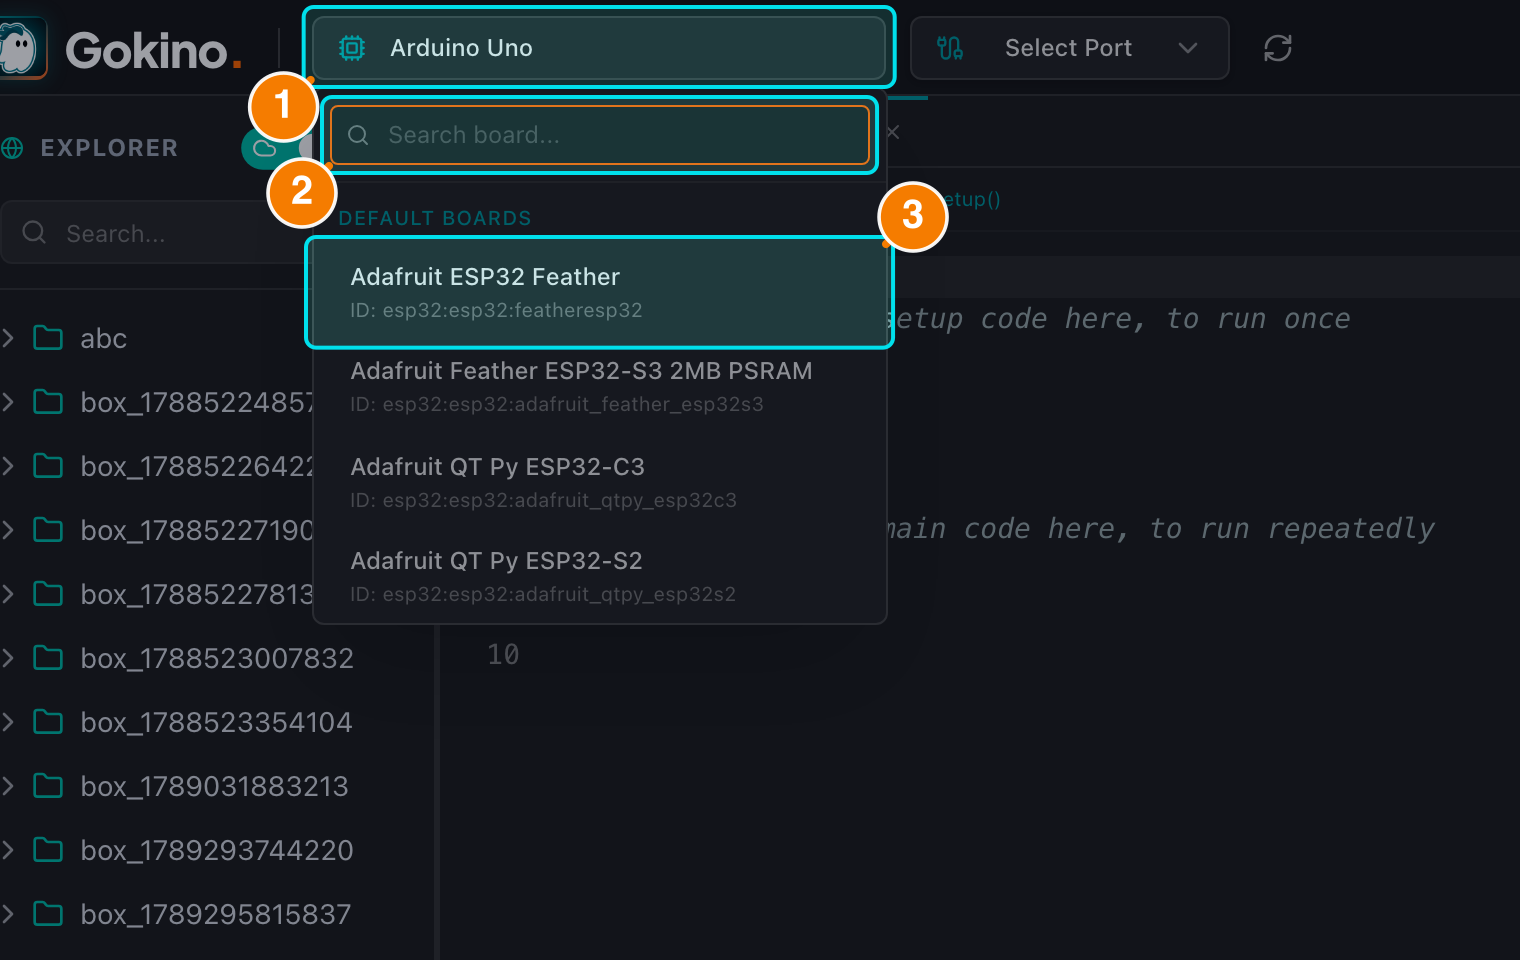
(1) Current board — click to open the list. (2) Search box. (3) A board to choose.
2. Port Selector
Gokino uses WebSerial to talk to the board directly from the browser (no drivers required on Chrome/Edge).
- Location: next to the Board Selector.
- Status: shows the connected port (e.g.,
COM3on Windows or/dev/ttyUSB0on Mac/Linux).
Connecting
- Plug the board into your computer with a data USB cable.
- Click the Port Selector (or the "Connect" option if no port is selected).
- The browser opens its native WebSerial dialog listing available devices.
- Select your USB device and click Connect.
- After connecting, the Header shows the port with its VID/PID (e.g.,
USB Device (VID:2341 PID:0043)).
Refreshing Ports
Plugged in a new board or swapped the cable? Open the Port dropdown and click the Refresh icon. Gokino re-scans navigator.serial.getPorts() instantly — no page reload. A device that has never been authorized must still be selected once through the browser's requestPort dialog.
Disconnecting
- Hover over the connection status button in the middle of the Header — it turns into a red Disconnect action.
- Click it to release the port.
- Alternatively, simply unplug the USB cable.
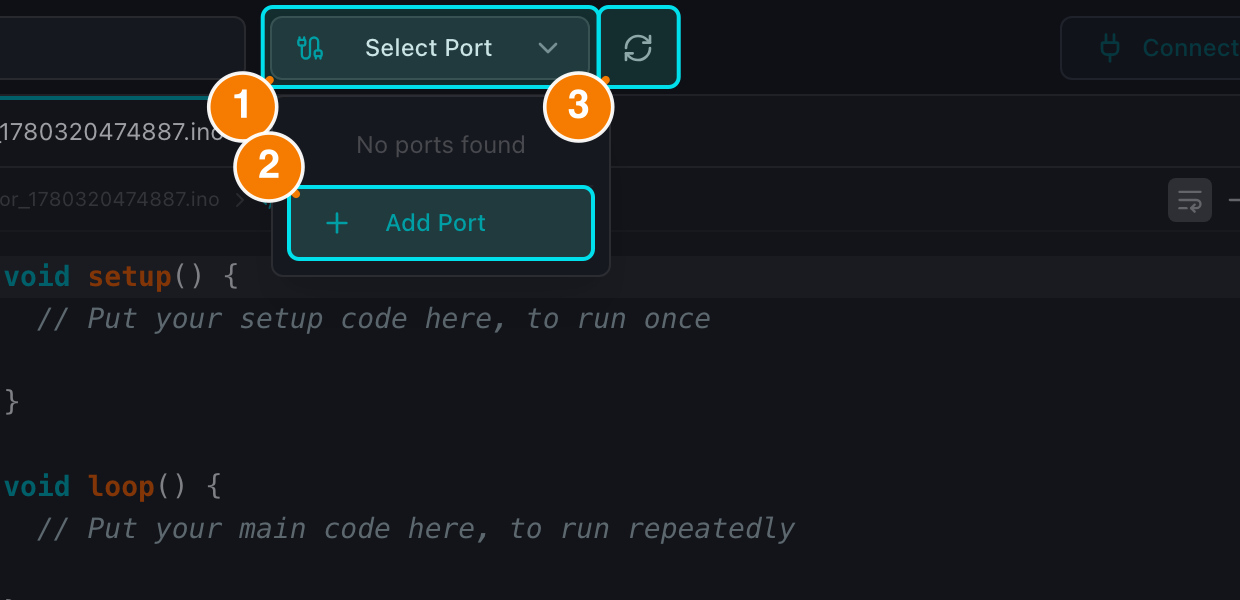
(1) Port selector. (2) Add Port opens the browser's WebSerial permission dialog. (3) Refresh re-scans already-authorized ports.
3. Check Connection Status
In the center of the Header, the connection status button is the quickest indicator that the system is ready.
- 🟢 Connected: blinking green dot, board and port name (e.g.,
Arduino Uno on COM3). Hover to reveal Disconnect. - 🔌 Not Connected: plug icon and "Connect Device". Click to connect (a board and port must be selected first).
- ⏳ Processing: spinner while connecting or disconnecting.
On small screens the Header is condensed and a Mobile Connection Bar appears at the top of the editor for the same operations.
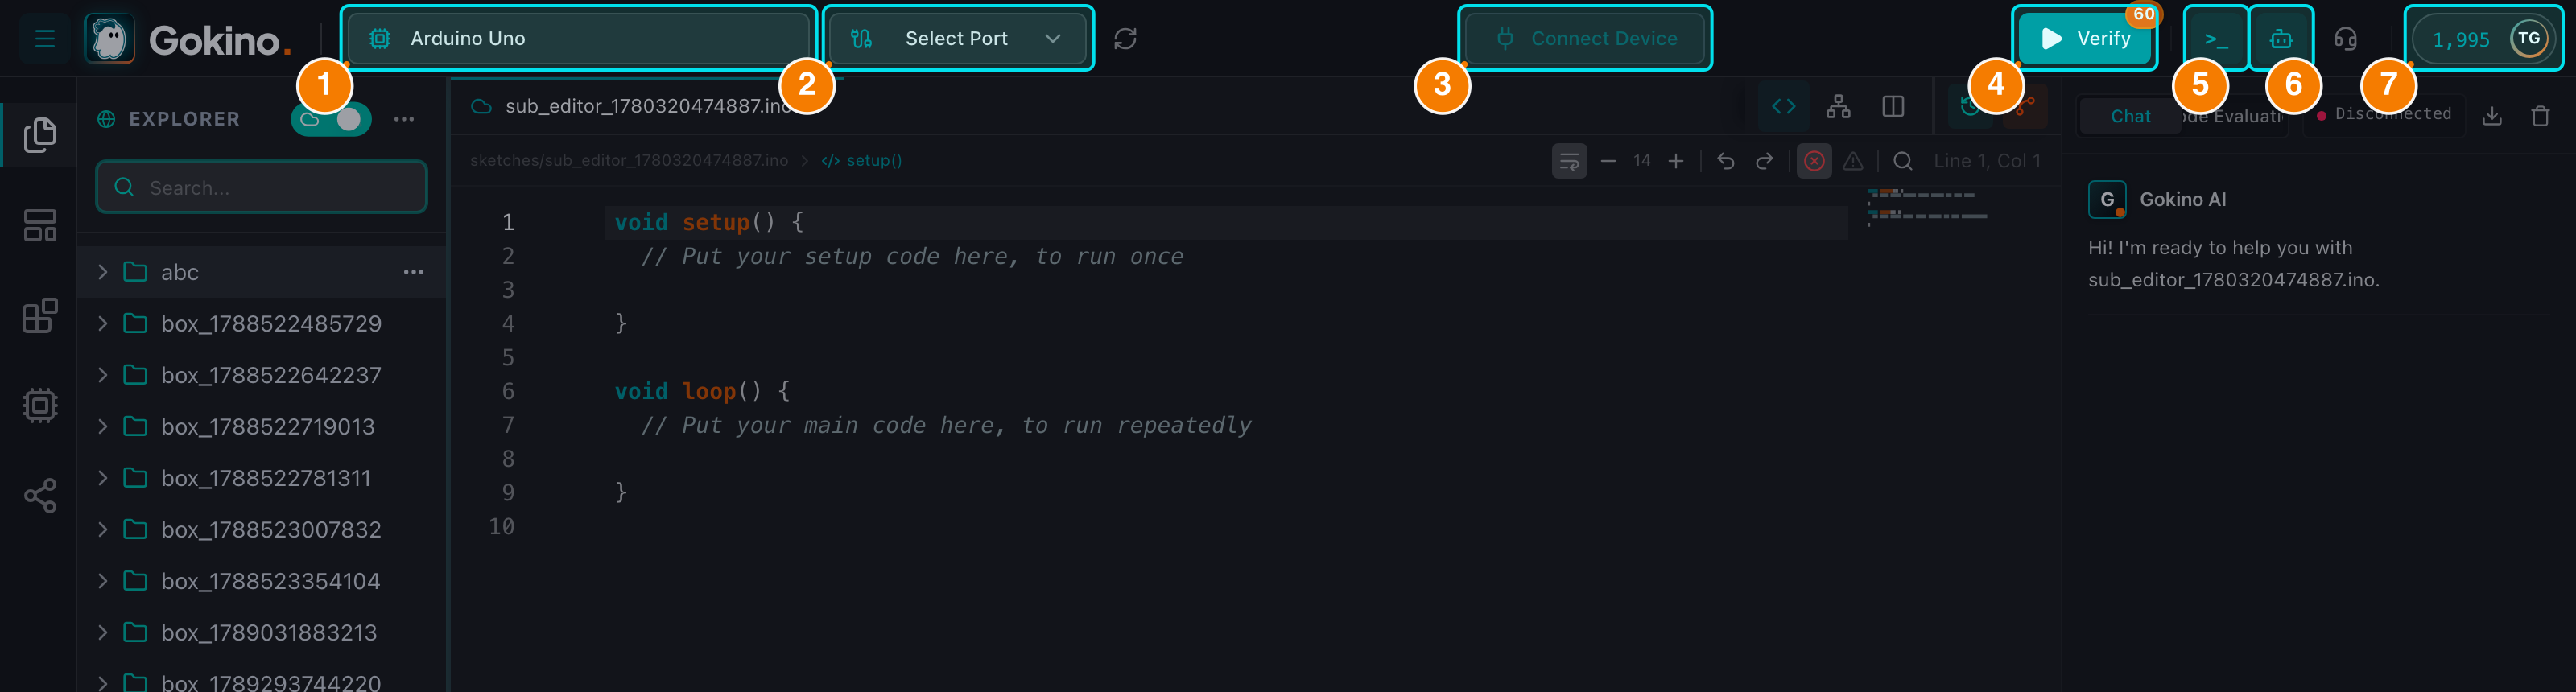
(1) Board selector. (2) Port selector. (3) Connection status — hover for Disconnect.
Once the light turns green, you are ready to Work with Source Code.